

One of the many things that you want to accomplish when building a new word press website. Creating your first page will be one of the main things that you’ll have to face. Then add them to your menu, this takes a few steps but we’re here to help you. This will teach the basics of how to create your first WordPress page and then add it to the menu. In other posts, you can learn more about adding posts to your navigation menu. Also, other things about tags but that will come soon. With this repetition will be your best friend and you’ll get the hang of things very quickly.
Login to Your WordPress Website
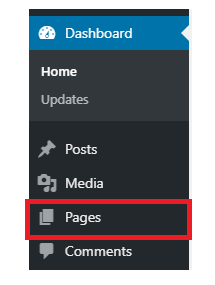
So the first thing that we want to do is log into your word press website. Once you’re inside the main dashboard you want to click on the “pages” tab on the left-hand menu. Once you click on the “pages” this will take you to all your pages that are on the website. WordPress comes with built-in pages. This is also where you will find all the pages that you will build during the construction of your website.
Now we begin adding the page. Next what we want to do is to look toward the top left of the page. You’ll see the “Add New” button at the top of the page this is how you will add a new page. Which will have the WordPress editor and all its original settings that come with a standard WordPress page. But in another post, I will share how you can install an editor and make this process a lot easier.

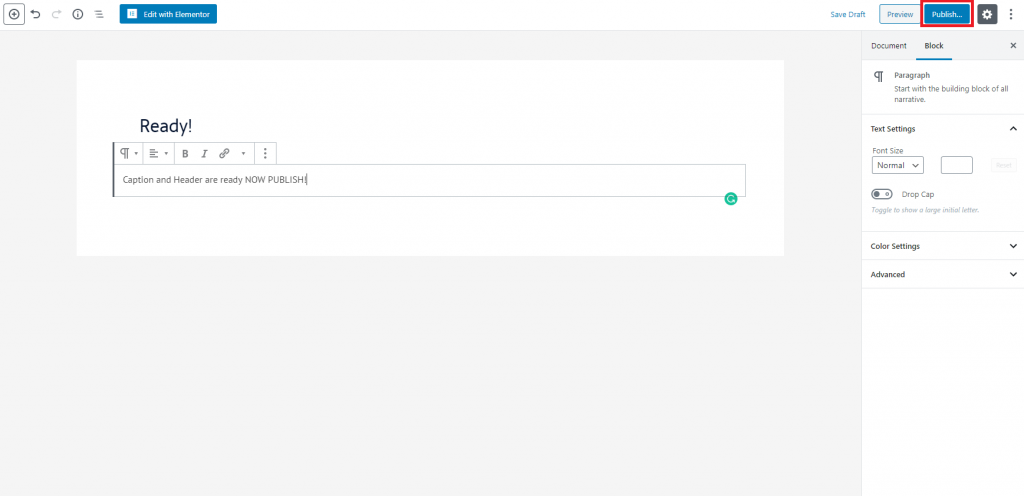
Once populated you can enter a title at the top of the page. There should be a box to allow you to do so. But right below that, there will be an editor where you can enter text for your page and insert images, as well but when you’re filling out the page you’ll notice that there’s a perm link field this will appear directly underneath the title which is what will show up in the URL. If you don’t like it you can always edit it. Here’s a link on how to do just that. WordPress will automatically determine the URL based on the setting that is selected inside the Settings > Permalinks.

Once your page is set up with a title and text in the body, you’re ready to click the blue “publish” button. It should be in the top right-hand corner once you click this will make the page live to the public.
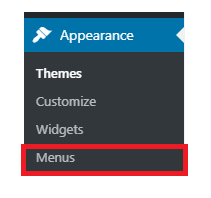
But it might or might not show up in your navigation menu depending on how it’s set up. But we can configure that now, what you will need to do is. Head over to the Appearance tab in the menu appearance > menu
Then once inside of the menu tab, you’ll need to create a new menu at the top of the page there will be a hyperlink saying “create a new menu” you’ll need to click this and then it will bring you into adding your first menu.

You need to come up with a name but something like “menu” Home menu” something simple will always work because no one will be seeing the name expect for you and other people who have access to the dashboard but once that’s all done go ahead and click on “create menu.”

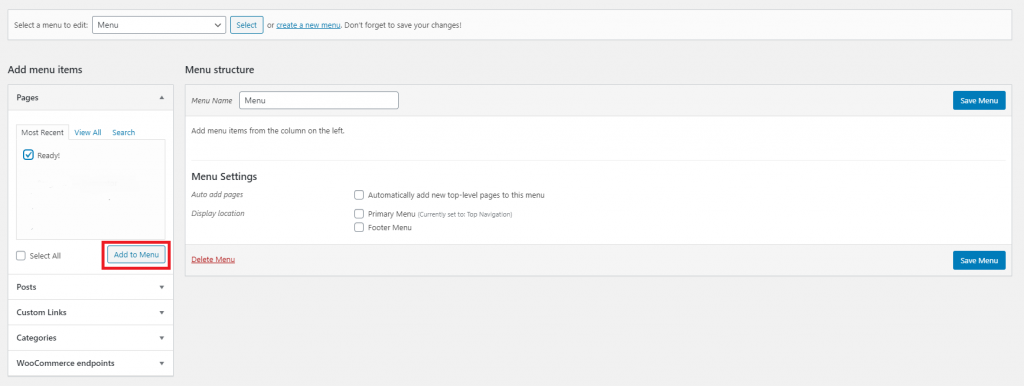
Finally, once the menu and page are now created we will want to navigate our eyes to the left side inside the menu page still and located our pages. Once found we will checkmark the page that we previously built then right below we will select “Add to Menu” once this is all set up we now have our first page, with our first menu. So moving forward if we wanted to create more pages you wouldn’t go create a new menu for each and everyone one… What you would do is just go to the initial menu you made and just add more pages to it.
Now you have learned how to create your first page and add this page to your first menu with your WordPress website. If you have any questions or need any help developing your very own WordPress Website, don’t hesitate to Contact Us!